DIY Home Decor: Hutch
Today marks the first segment of a new series I’d like to start with all of my do-it-yourself projects I’ve been working on both at my house and my condo. For the first DIY home decor segment I present you with the hutch I recently remodeled.
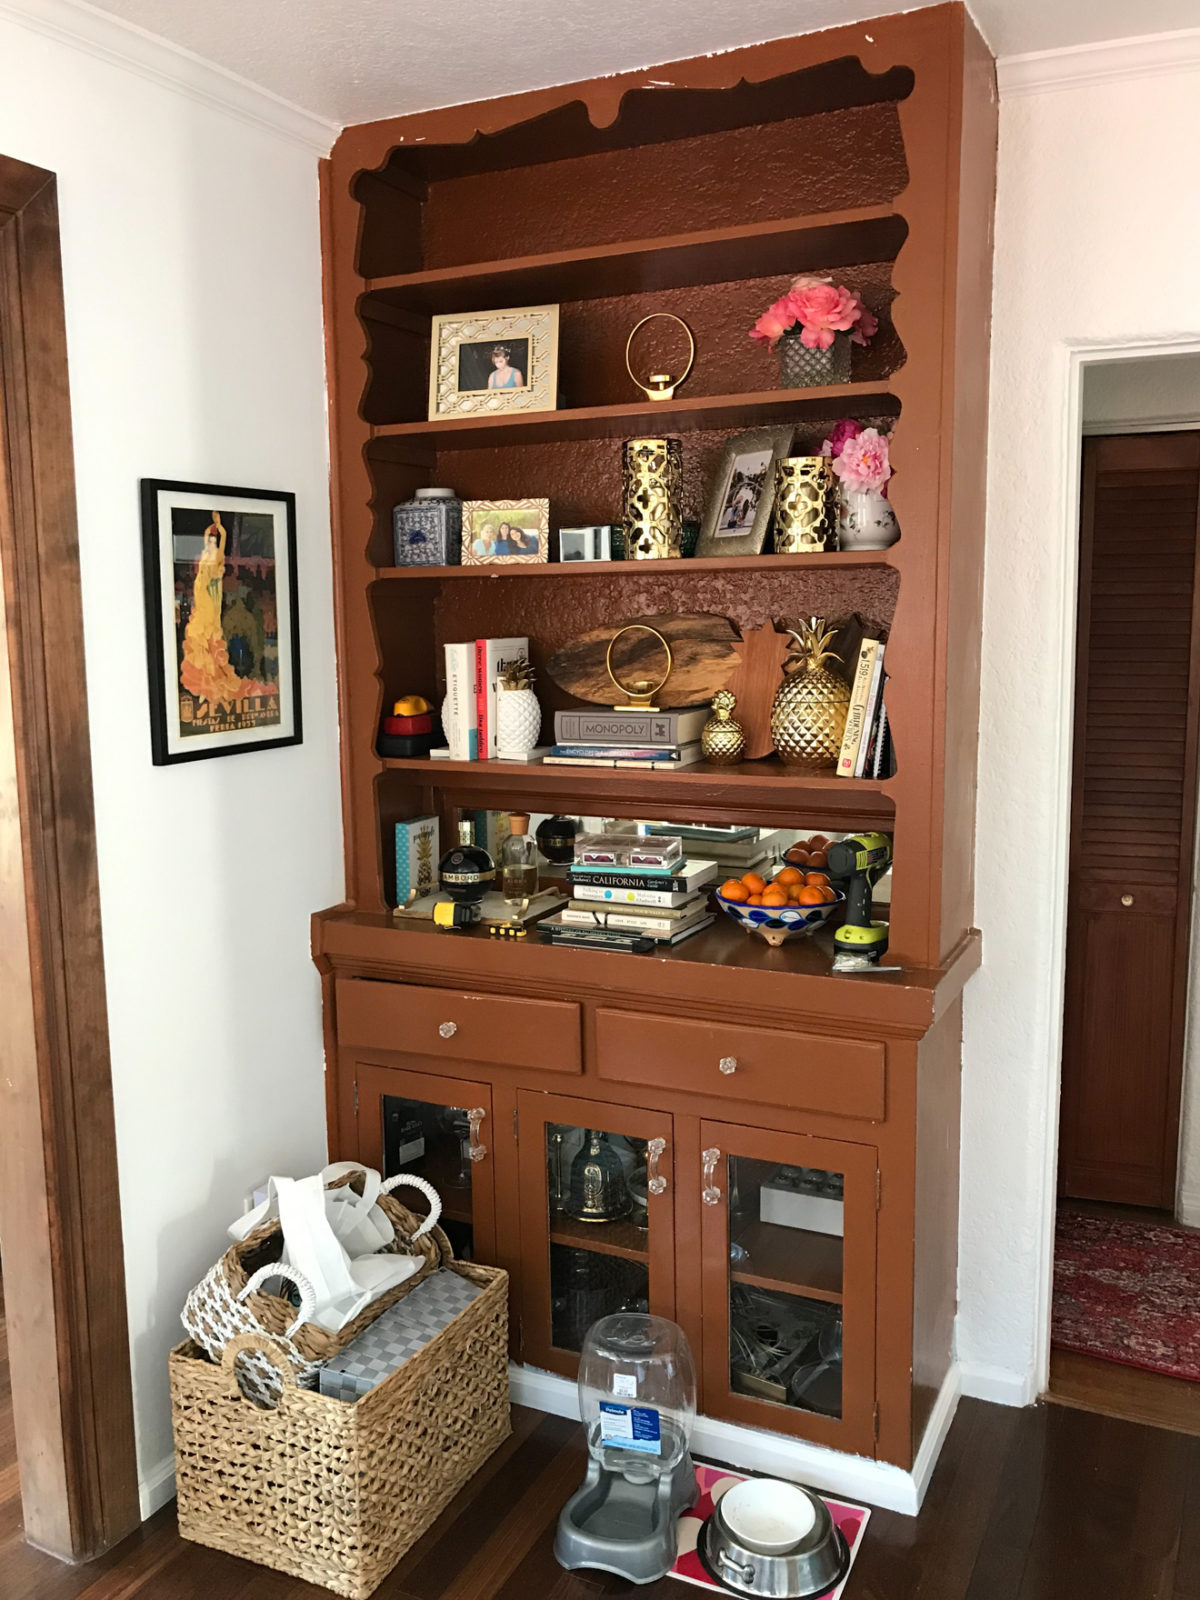
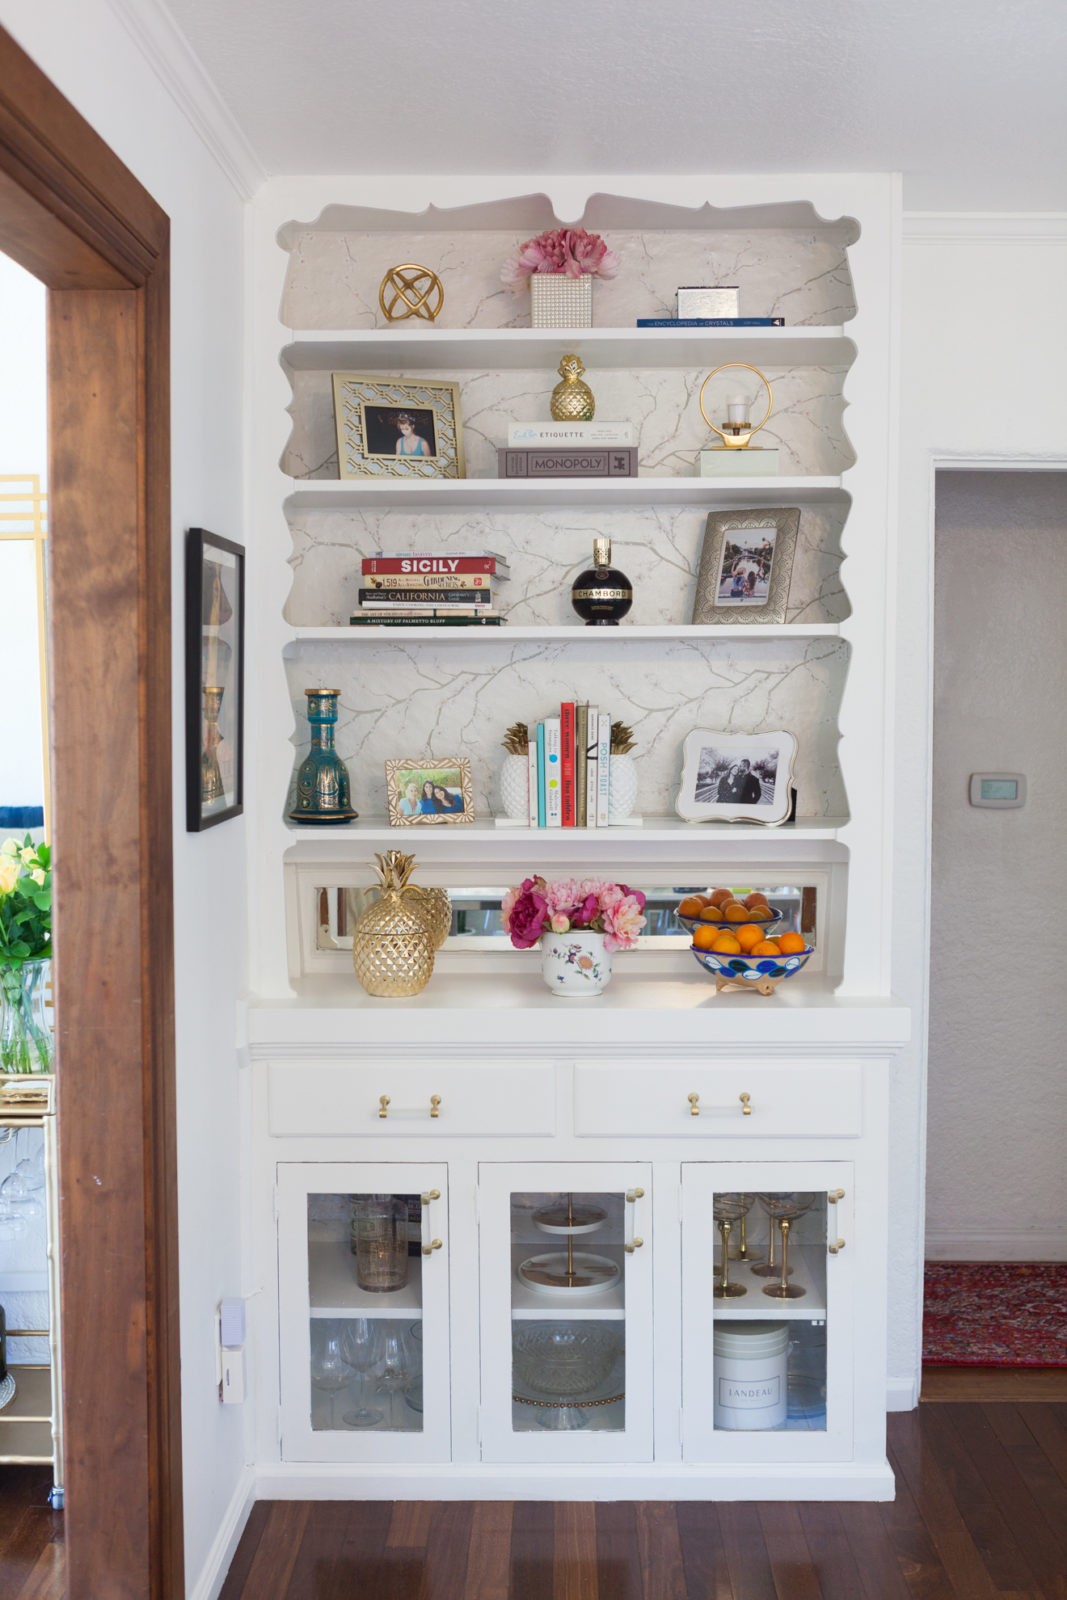
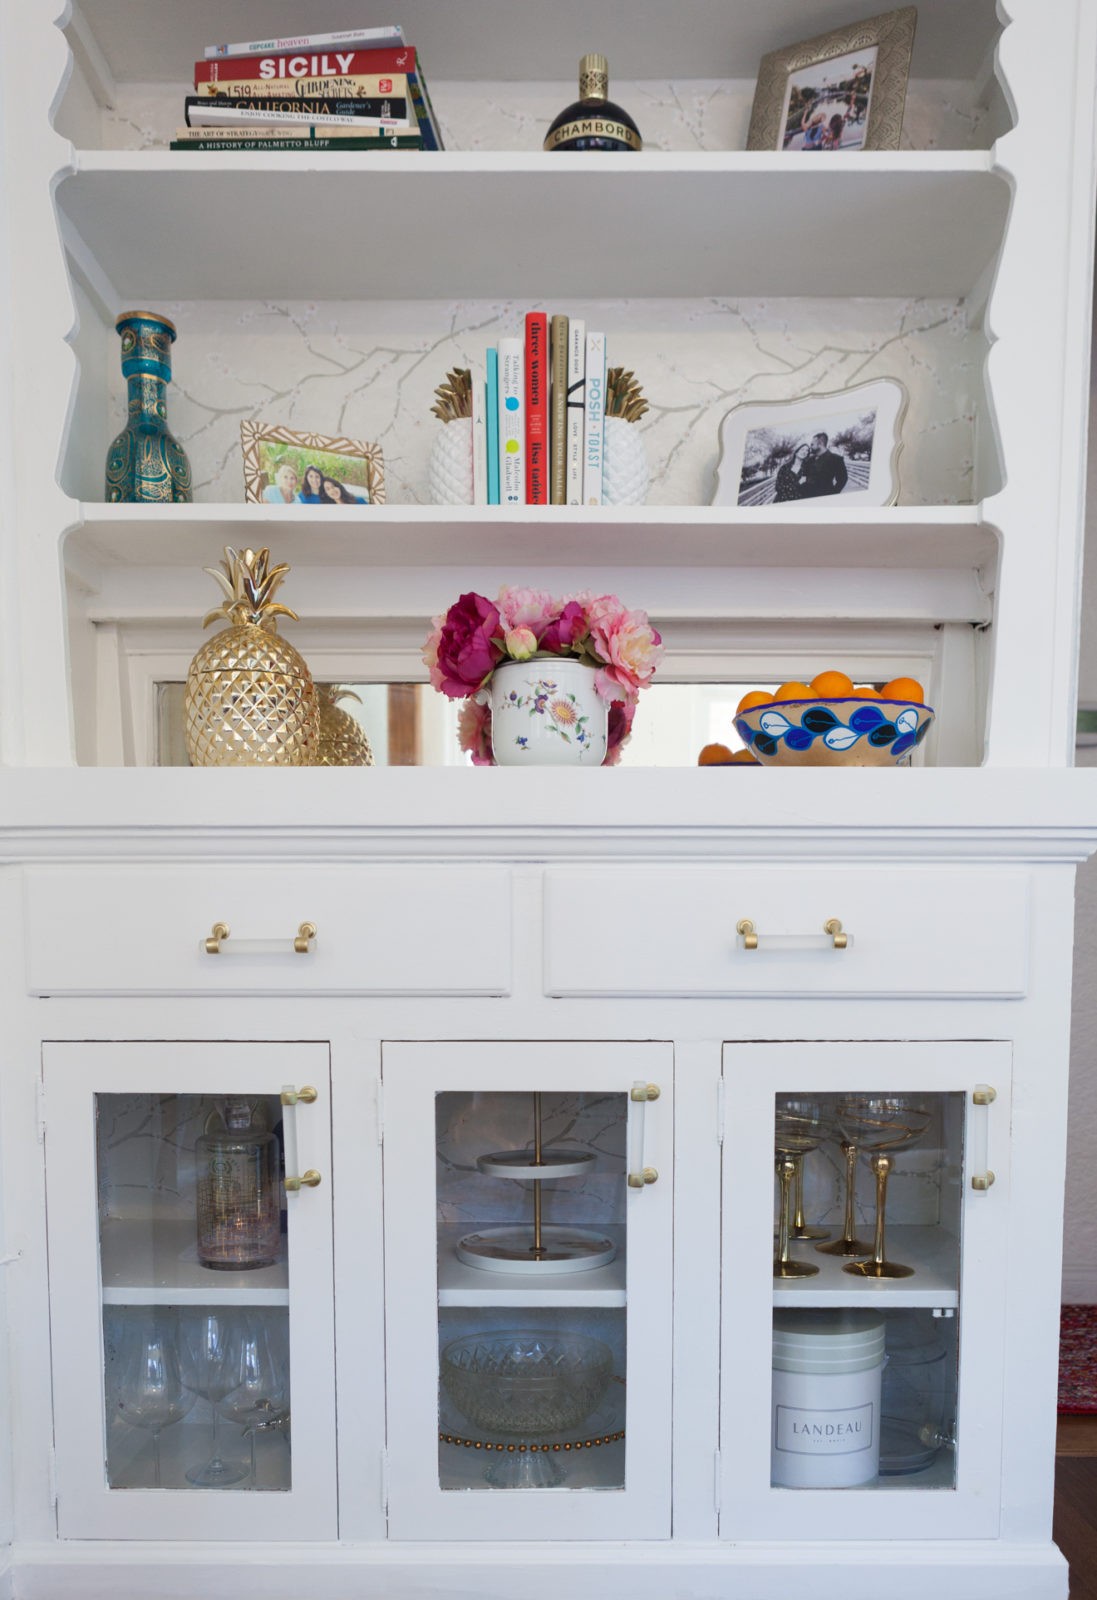
One of the big selling points of buying my home for me was all of the original and charming built-ins. My favorite being a floor to ceiling hutch in the dining room. The color, however, needed to be changed. It was the worst color brown you could imagine.
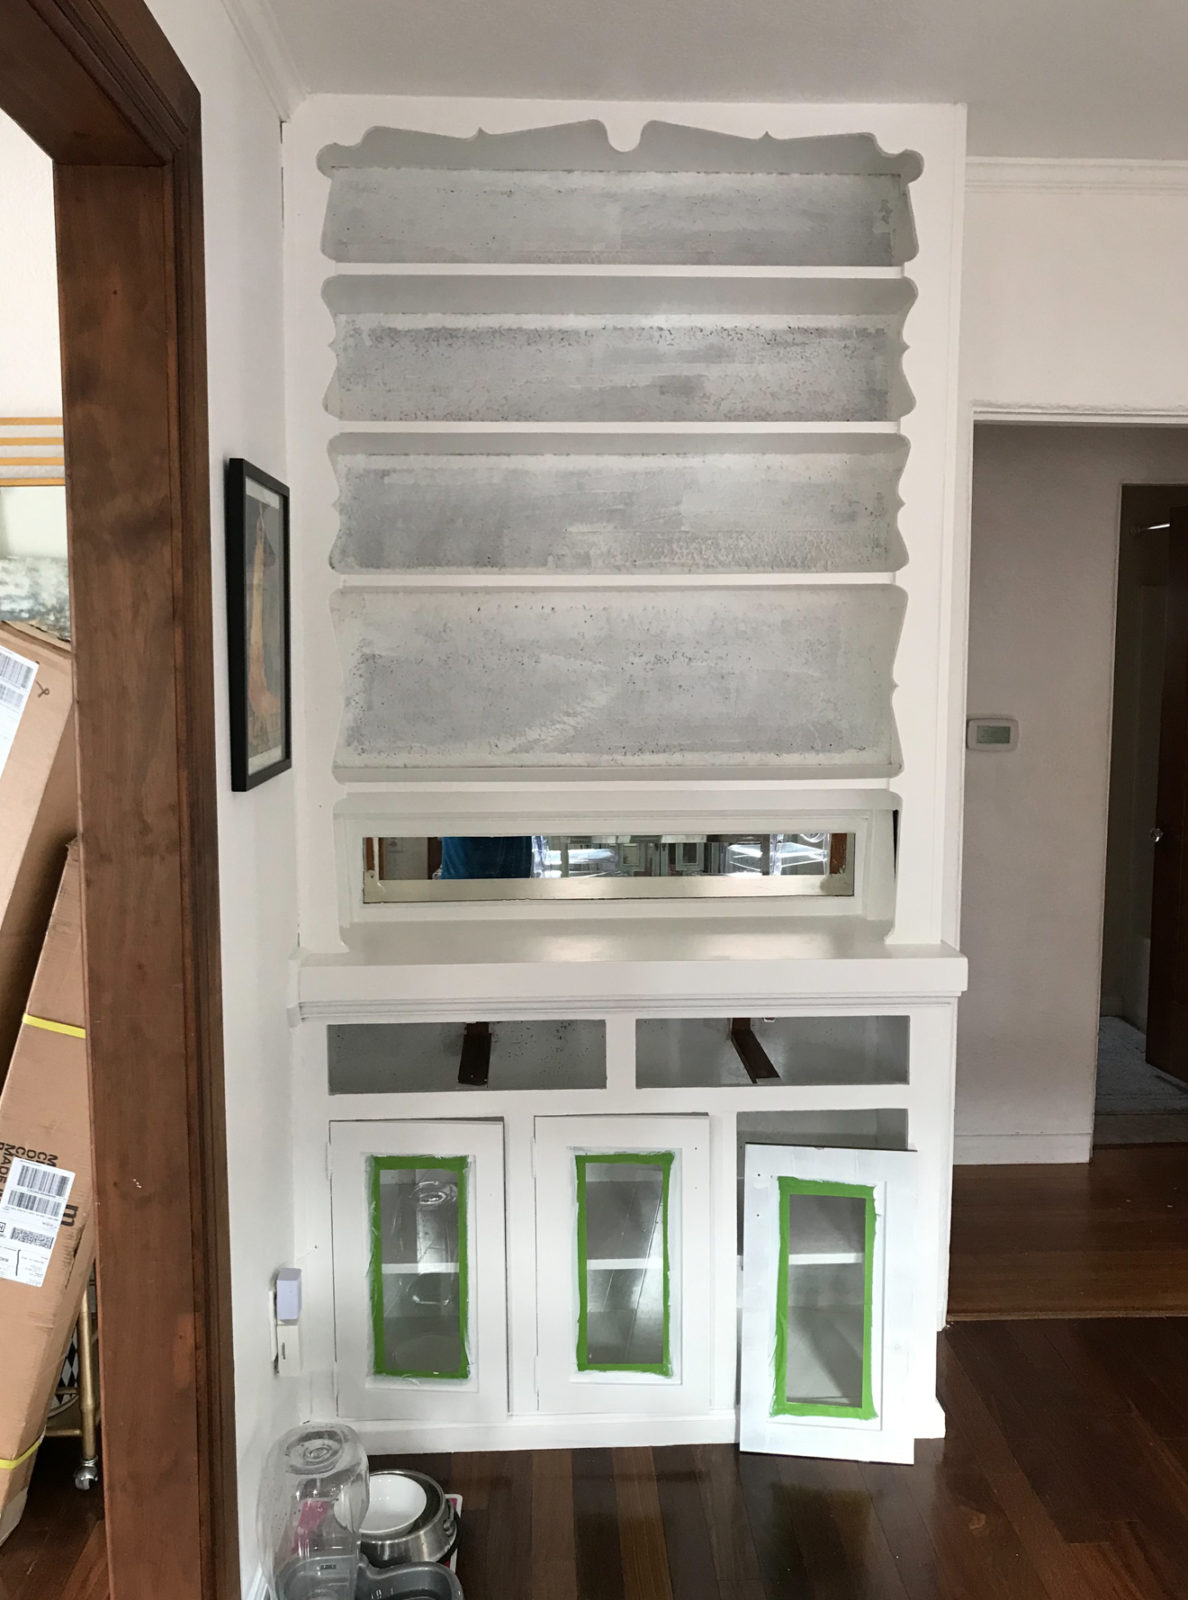
The transformation started by taking off all of the hardware, drawers, and cabinets. Then carefully taping off the area to avoid paint all over the floors and across the mirror of the hutch that sits behind the very bottom shelf. I recommend this Frog tape. It leaves the cleanest lines.
The materials I used cost me less than $75 and were:
- a paintbrush
- 4-inch rollers (smooth surface)
- 4-inch roller handle
- primer
- Behr Marquee satin paint in the color “Polar Behr”
- white caulk
- caulking gun
I primed the entire cabinet first to help the paint adhere to the hutch. I only ended up sanding the drawers down because sanding the entire hutch with all my furniture in the house would have been a BIG mess.
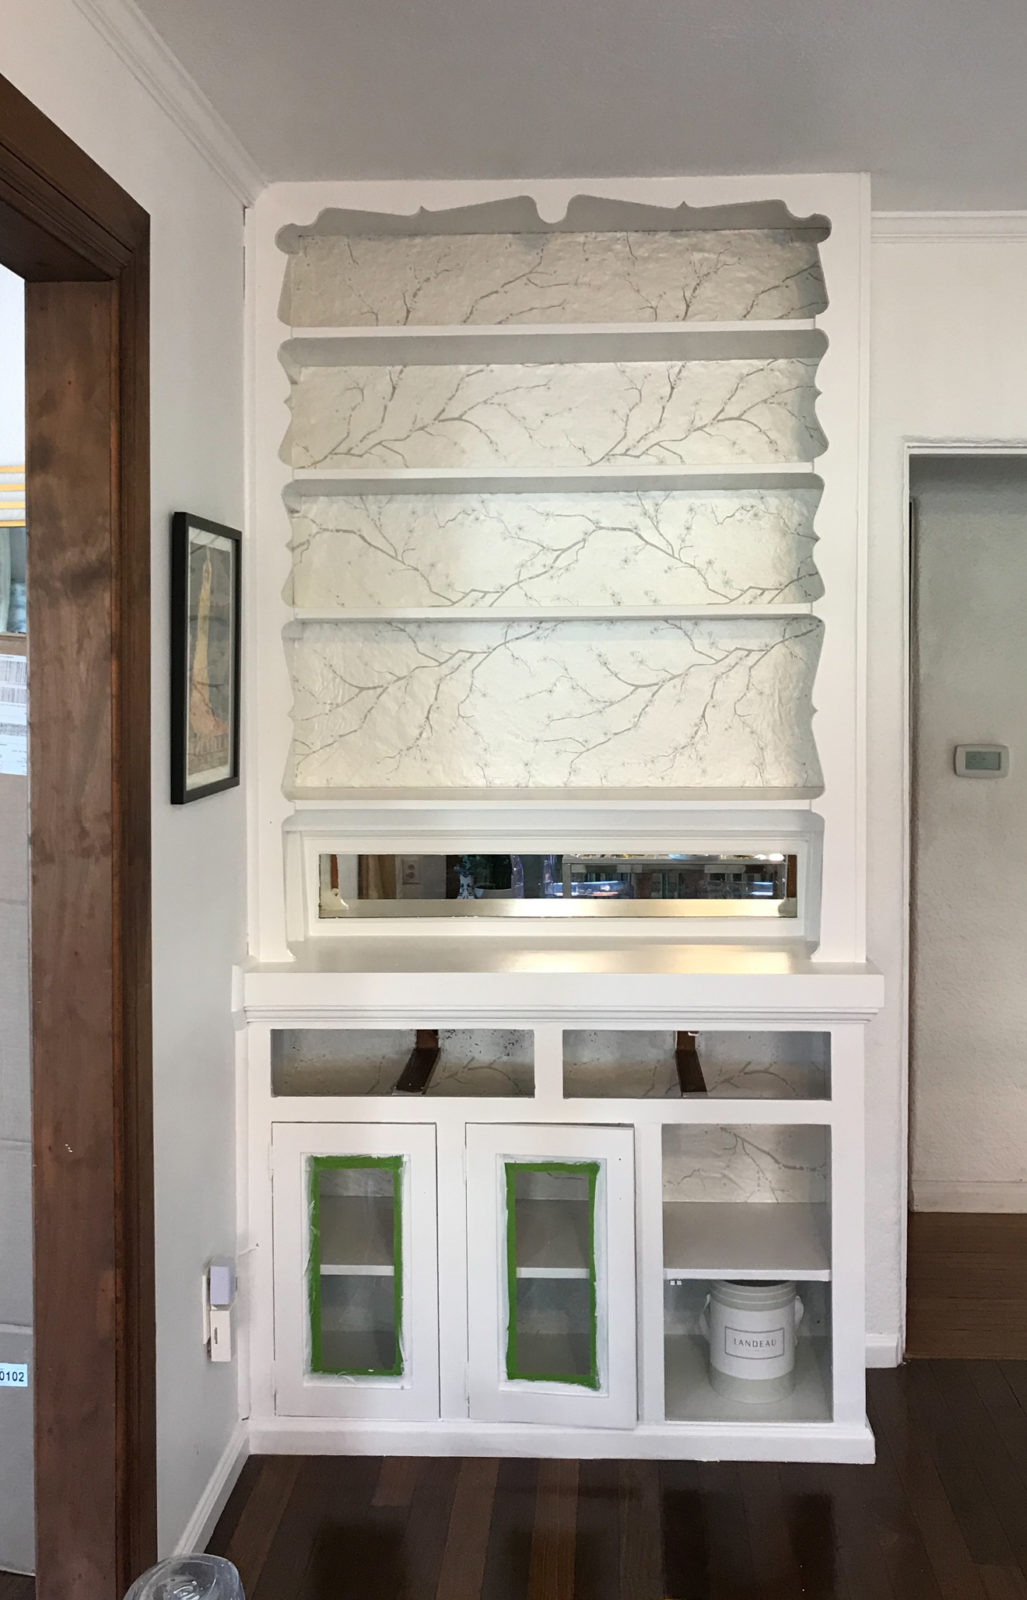
It took one coat of primer and about two light coats of paint to cover all the brown. The color I used on this hutch is the same I used all over my house. I used the matte sheen on the walls and satin sheen on any baseboards, crown molding, and cabinets.
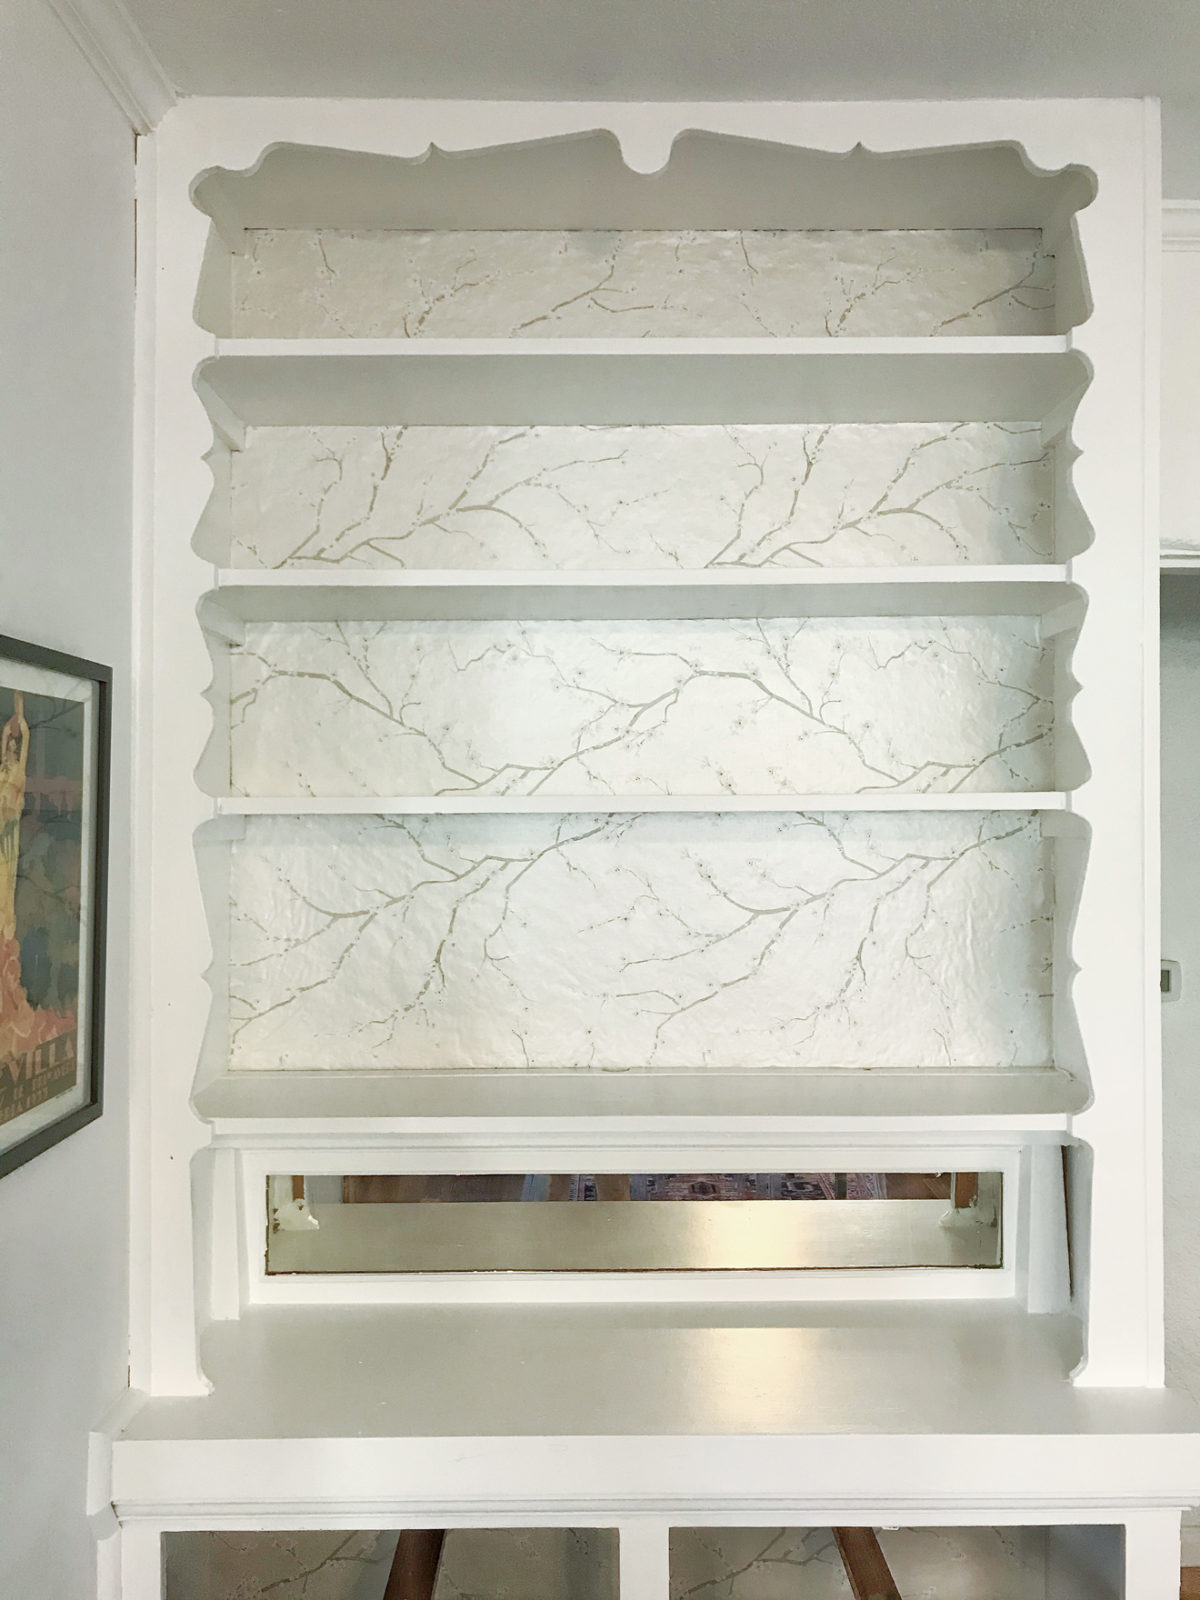
The back of the hutch wall was textured, but that didn’t stop me from adding a beautiful metallic floral wallpaper that I ordered on Amazon. I’ll be ordering another roll of this to apply to my shoe shelves in my closet. (My next DIY home project.) I loved the wallpaper so much I even decided to put it inside the drawers for an added touch.
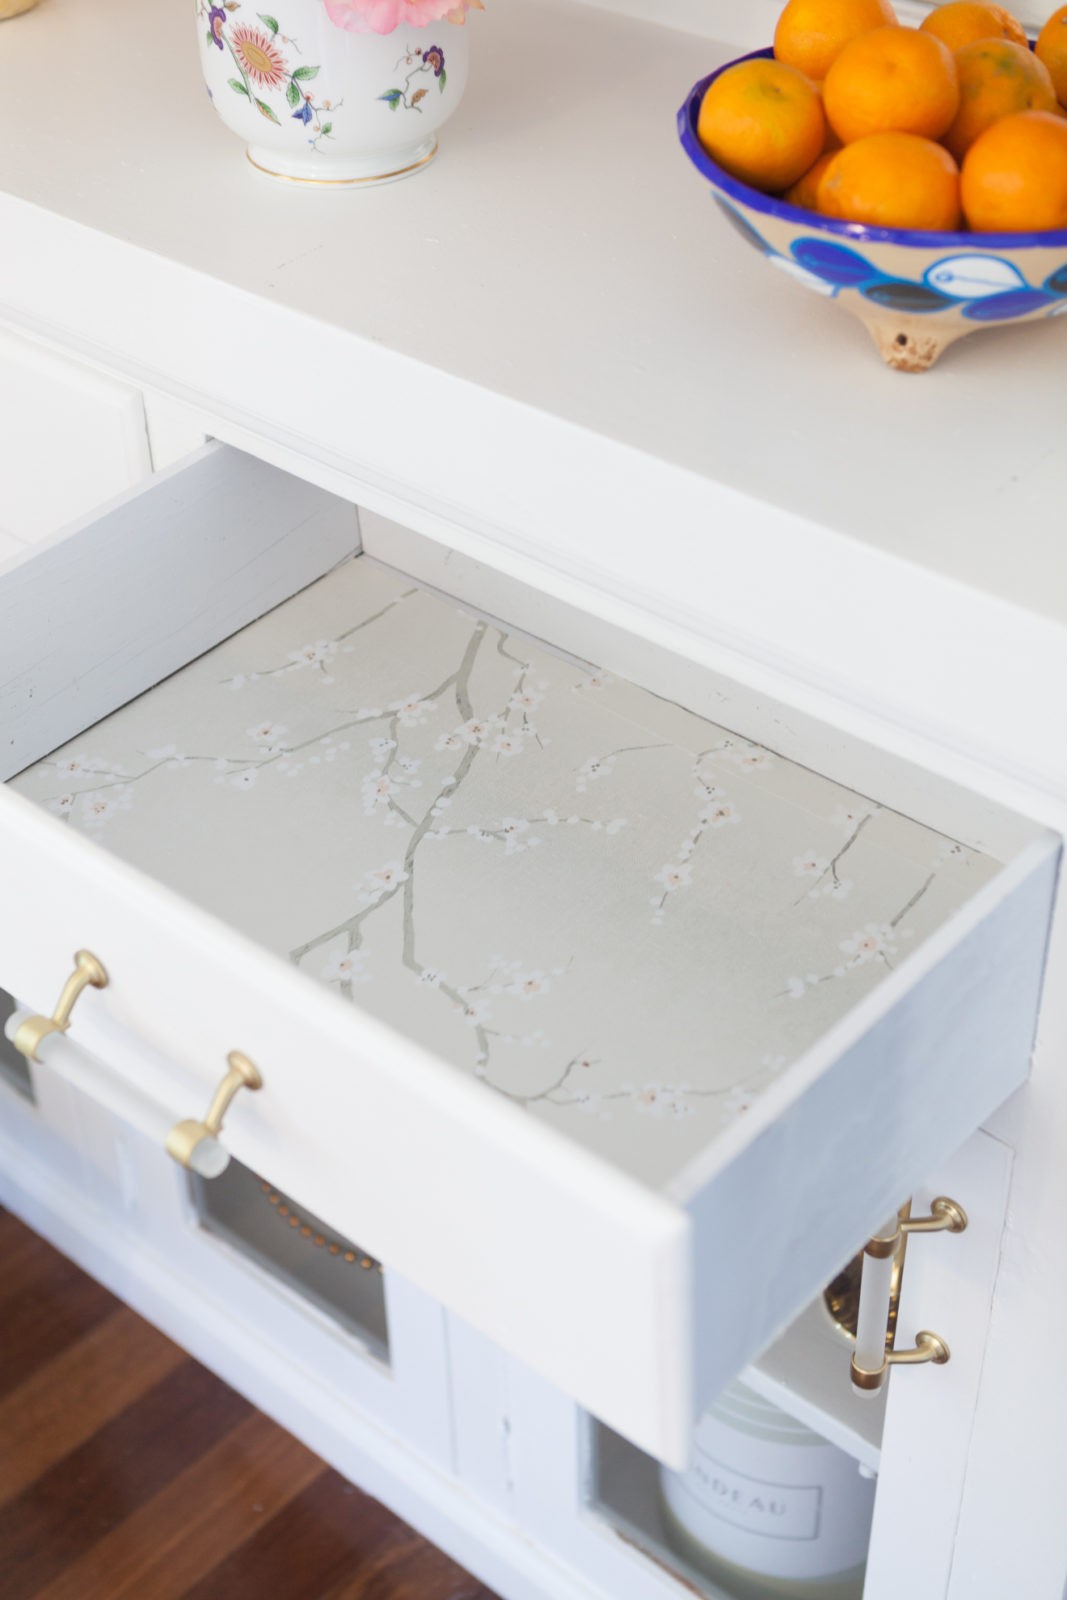
One extra step I added that many people might not think of is caulking to fill in the gaps between the wall and the hutch. It takes a bit of time, but it is honestly my favorite job because you see the results instantly and it’s pretty simple to do after you have a bit of practice with a caulking gun. You can see the difference in the small gap drawer above that I hadn’t caulked yet when these photos were taken.
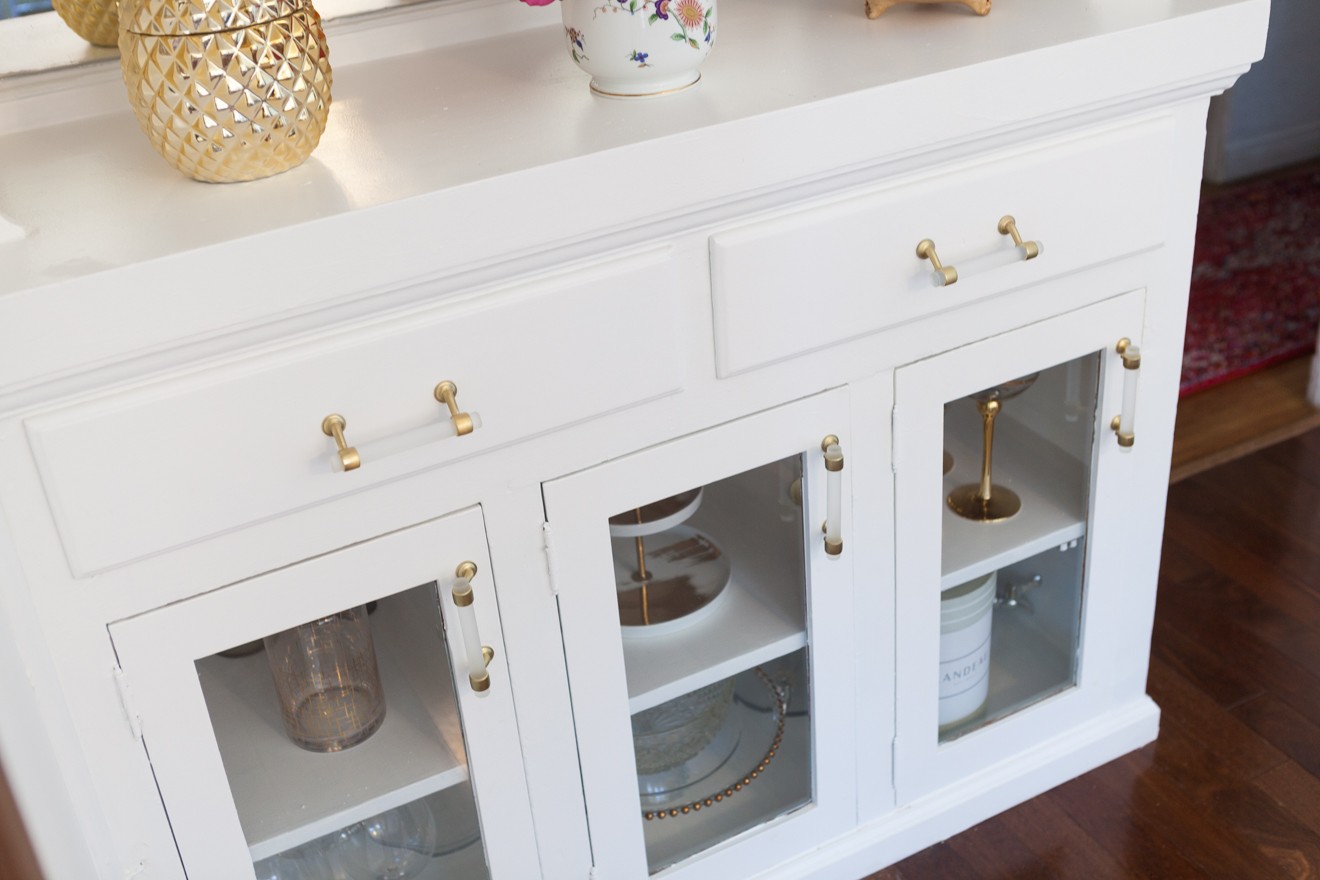
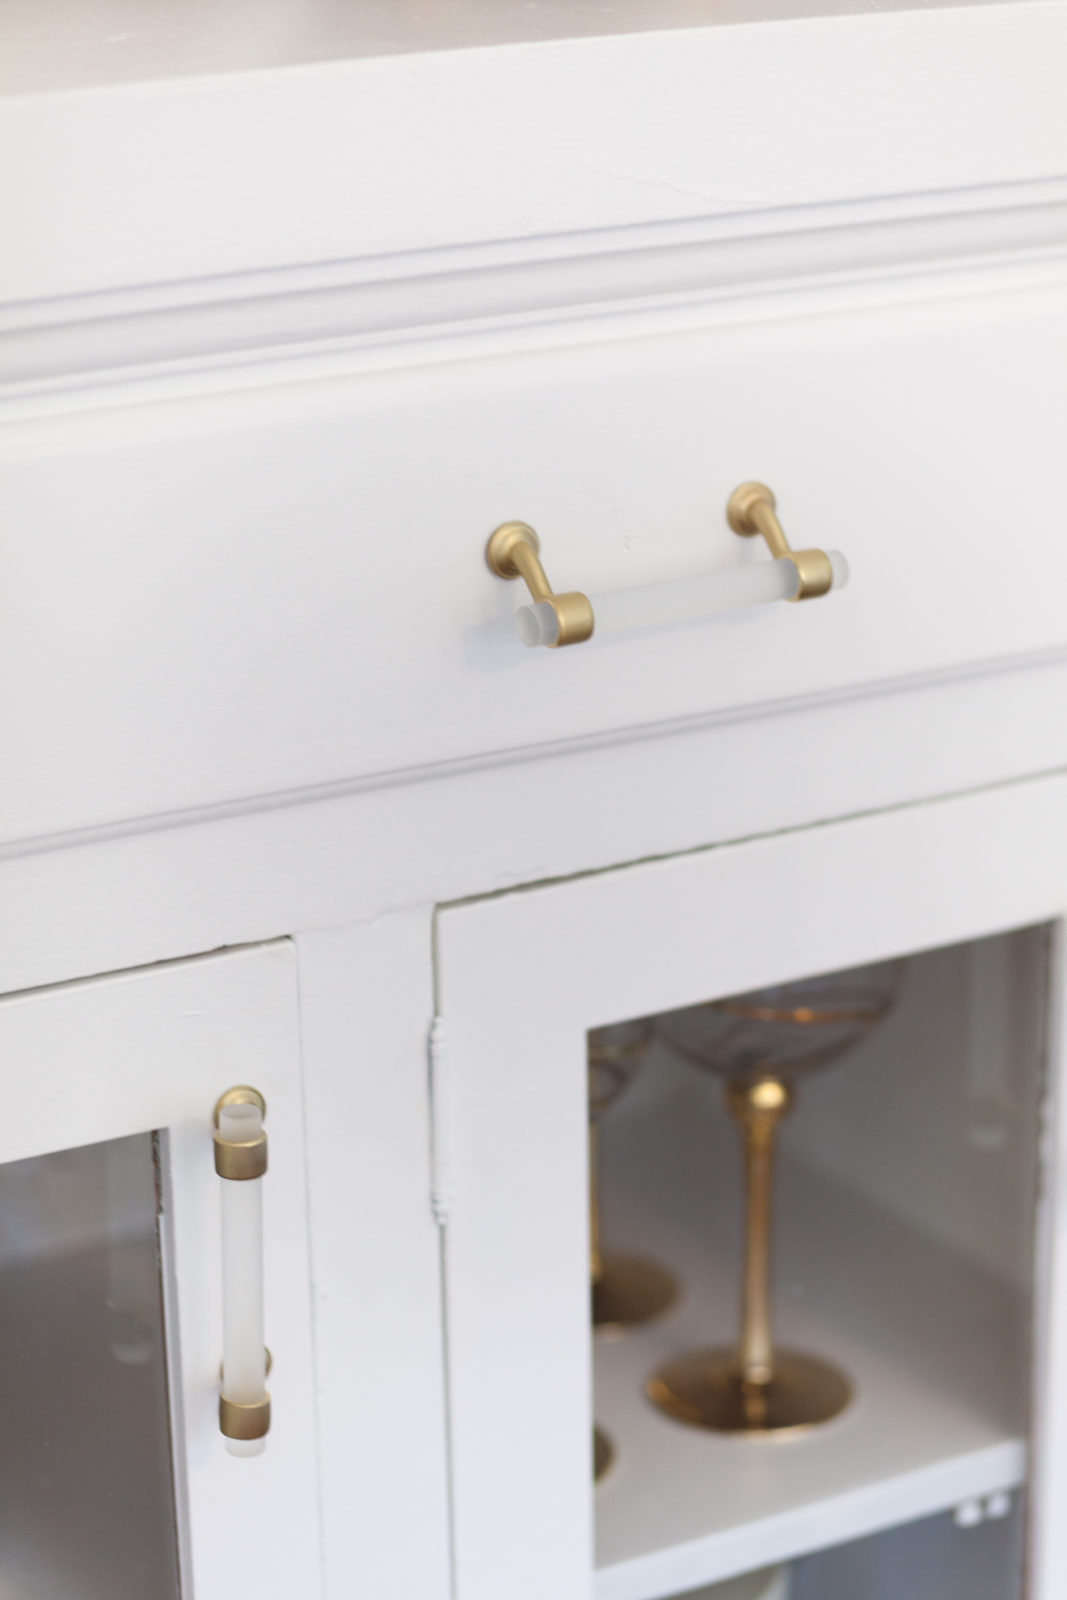
The drawer pulls are a beautiful brushed brass with frosted glass that I bought at Home Depot. Putting these on was a little tricky as I like to triple check every measurement, but in the end, it was totally do-able.
I understand that DIY projects can be intimidating to a lot of people. My recommendations are to just start small and build your confidence. Once you’ve completed one task, you’ll want to start exploring to see what else you can do and get more comfortable with your tools. I’m not a pro around a power drill 😉
Check out more of my DIY projects here!
As always, thank you for stopping by and make sure to enter the loop giveaway I’m doing on Instagram with a few other DIY blogger gals! I’ll be posting more detail photos on how to decorate shelves like this on Monday so see you then and have a great weekend!
xoxo,
Laura
Shop This Post:


